J&J Development Remodeling INC
-
Phone Number
(661) 675-6520 -
Email
joseph@jjdevelopmentinc.com -
Work Hours
8:00 AM - 6:00 PM
5 Basement Waterproofing Methods Compared
Alright, hands up if your basement smells like a wet sock. Or maybe you’ve got a puddle forming by the washing machine every spring. We’ve all been there. That smell and those mystery puddles are your house’s way of saying “I need some help down here!”
So, you’ve probably Googled, “how do you waterproof a basement that’s always damp?” Good question. Because doing nothing isn’t an option. That dampness can turn into mold, wreck your stored holiday decorations, and even cause some serious foundation issues.
The good news? You don’t need to be a contractor to figure this out. We’re going to break down the five main basement waterproofing methods, so you can find your fix and reclaim your basement from the creepy-crawly damp.
How to Identify Basement Water Problems
Before we jump into the solutions, let’s make sure we’re fixing the right problem. Sometimes the signs are obvious, other times, they’re not.
Here’s what to look for, besides the obvious puddle:
- Musty Smell: That musty odor is a dead giveaway. It’s not just old air; it’s the scent of mold or mildew starting to party in your damp basement waterproofing section.
- White, Chalky Dust on Walls: See a white, powdery line on your concrete walls? That’s called efflorescence. It’s basically salt left behind after water travels through the wall and evaporates. It’s a sign that moisture is on the move.
- Bubbling Paint or Warped Paneling: If your wall finish looks like it has a skin condition, water vapor pushing from behind is usually the reason.
- Random Dark Patches or Streaks: These are water stains. They’re like a map showing you where the leaks have been, even if they’re dry now.
- Cracks in Walls: Small hairline cracks happen. But if you can slide a coin into a crack in the wall or floor, it’s a direct highway for water.
Think of these signs as your basement sending you a text message. Ignoring it won’t make the problem go away; it just lets the issue get bigger and more expensive. Spotting these early is the first step to choosing the right fix from the types of basement waterproofing we’ll talk about next.
Quick Comparison Table of Types of Basement Waterproofing
Alright, so you’ve spotted the signs. Now you’re wondering, “What does fixing this actually look like, and what’s it going to cost?” Let’s cut to the chase.
Here’s a quick snapshot of your main options. Think of this as your menu before we dive into the details of each “dish.”
Method | Best For | Cost Estimate | Lifespan | Maintenance |
Interior Basement Waterproofing | Minor leaks & wall seepage | $500–$1,500 | 5–10 yrs | Annual inspection |
Exterior Basement Waterproofing | High water pressure & persistent seepage | $8,000–$15,000 | 20–30 yrs | Minimal upkeep |
French Drain / Interior Drainage | High groundwater | $3,000–$6,000 | 15–20 yrs | Annual cleaning |
Crack Injection / Wall Sealing | Localized cracks & leaks | $300–$1,200 | 10–15 yrs | Check every 2–3 yrs |
Sump Pump Systems | Flood-prone areas | $1,000–$2,500 | 8–12 yrs | Quarterly testing |
See a method that sounds like it fits your situation and budget? That’s the point of this table. Now, let’s get into the details of each one, starting with the most common first step people take, which is waterproofing inside basement with sealants.
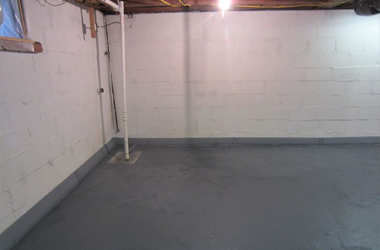
Interior Basement Waterproofing
So, your walls feel damp or look a little sweaty, but there’s no rushing river. This is probably where you start waterproofing your basement. Using an interior basement waterproofing sealer is like putting a waterproof coat of paint on the inside of your basement walls and floor.
You clean the concrete, maybe fill some tiny cracks, and roll or brush on a special basement waterproofing sealer. This creates a barrier that blocks moisture vapor from seeping through. It’s a popular choice for waterproofing basement walls from inside.
Pros:
- Budget Friendly: It’s the most affordable option upfront.
- DIY Project: You can tackle this over a weekend.
- Quick Fix: Great for calming down minor dampness and musty smells.
Cons:
- Not a Cure: It doesn’t stop water pressure from the outside. If you have a real leak, the pressure can just push the sealant right off the wall.
- Short Shelf Life: You might be reapplying it every few years.
- Can Trap Moisture: In some cases, it can trap moisture within the wall, which isn’t ideal.
That persistent damp feeling, light condensation, or as a temporary hold until you can do a bigger fix. It’s a good first step, but if your problem is more like “water feature” and less like “damp wall,” you’ll need to look at the drainage solutions.
Exterior Basement Waterproofing
If interior sealants are a band-aid, then external basement waterproofing is major surgery. This is the big one. When people ask, “how to waterproof the basement from outside for good?” – this is the answer. It involves digging a trench all around your house down to the foundation footings.
How it works is that contractors excavate the soil, clean the foundation walls, and apply a thick, tar-like or rubberized membrane. They often add a special drain board and a pipe at the footing to catch any water and send it away. It’s the ultimate waterproofing basement walls from outside.
Pros:
- Stop Water at the Source: It tackles the problem before water even touches your basement wall.
- Longest Lasting: Done right, this can protect your home for decades.
- Handles Pressure: It’s designed to withstand serious hydrostatic pressure (that’s the force of water in the soil).
Cons:
- Major Investment: It’s the most expensive option by a long shot.
- Big Disruption: Your yard will look like a construction site for a while.
- Not a DIY Job: This is 100% a “call the pros” project.
Think of it like giving your house a permanent, underground raincoat. It’s the best defense for serious, ongoing leaks or if you’re doing a major home renovation. If your problem is water coming up through the floor, not just the walls, then you need to look at the next method.
French Drains / Interior Drainage Systems
Okay, what if the water isn’t just seeping through the walls, but actually rising up through the floor? That’s a high water table, and no amount of wall coating will fix it. This is when you need to think about waterproofing basement floor issues with an interior drainage system, almost always paired with a sump pump.
A trench is cut along the inside perimeter of your basement floor. A perforated pipe is laid in, covered with gravel, and then sealed over. This pipe catches water coming in from the walls and the floor, channeling it to a pit. That’s where the sump pump kicks in, pumping the water up and away from your house. It’s a key part of waterproofing for basement floor problems.
Pros:
- Handles Serious Water: This is your go-to for active leaks, seepage, and groundwater rise.
- Less Disruptive: No need to dig up your yard.
- Highly Effective: It manages the water that gets in, which is often the most practical solution.
Cons:
- Doesn’t Block: Water still enters your basement; it just gets collected and removed immediately.
- Needs a Pump: You’re relying on mechanical equipment (the sump pump) that needs power and maintenance.
- Loses a Little Floor Space: The trench and cover system sit flush with the floor but are noticeable.
This system is like installing gutters and a downspout inside your basement. It’s not about building a dam; it’s about directing the flow of water. For many homes with chronic wetness, this is the most effective solution. And that sump pump we mentioned? It’s so important, it deserves its own quick look.
Crack Injection / Wall Sealing
See a single, obvious crack where water dribbles in every time it rains? You don’t always need a whole system. Sometimes, you just need a sniper’s solution. That’s crack injection. It’s not a full waterproof basement walls strategy, but a targeted repair for a specific flaw.
A pro drills small holes along the crack, then injects a special expanding polyurethane or epoxy resin under pressure. It fills the crack from the inside out, creating a permanent, flexible seal. This is a common fix when other methods aren’t needed.
Pros:
- Targets the Exact Problem: No guesswork. You fix the leak you see.
- Cost-Effective for Single Cracks: Way cheaper than excavating or installing drains.
- Minimal Mess: It’s a relatively clean, indoor job.
Cons:
- Only Fixes the Crack You Inject: It won’t stop water from finding a new, weak spot right next to it.
- Doesn’t Address the Cause: The crack happened for a reason (settling, pressure). This fixes the symptom, not the root issue.
- Skill Matters: Getting the right pressure and fill requires a pro to do it right.
Think of it like using super-strong glue to fix a single, leaking seam in a boat. It works perfectly for that one spot, but it doesn’t make the whole boat watertight. If you have multiple cracks or general seepage, you’re back to looking at the sealant or drainage methods we talked about earlier.
Sump Pump Systems
You’ve heard it mentioned a few times. If an interior drainage system is the basement’s gutter, the sump pump is the downspout that kicks the water out. Sometimes, it’s the main player, especially if you already have a drain or just get a sudden flood. It’s the final answer for “how to waterproof a basement that keeps flooding?”
The way it works is that a pit (sump pit) is dug at the lowest point of your basement. A pump with a float switch sits inside. When water fills the pit, the float rises, triggers the pump, and it pushes the water out through a pipe away from your house. It’s an important piece of basement waterproofing material.
Pros:
- Powerful Water Removal: It physically pumps large volumes of water out.
- Essential for Flooding: The only real solution for active flooding or a high water table.
- Backup Options: You can get battery backups so it works during a power outage (a lifesaver during storms).
Cons:
- It’s Reactive: It only works once the water is already in the pit.
- Can Fail: Pumps wear out, switches stick, power goes out.
- Needs Maintenance: You must check it regularly, especially before rainy seasons.
Think of it as your basement’s dedicated bouncer, throwing water out as soon as it shows up. Now, how do you pick the right method for your home?

Choosing the Right Method for Your Home
You didn’t read all this just for a science lesson. You want to know what to do. So let’s get down to it.
Forget trying to be a hero. Your job isn’t to become a basement waterproofing expert overnight. Your job is to stop the water.
Here’s your cheat sheet:
Be a detective. Go downstairs after it rains. Is the wet spot on the wall or the floor? One crack or a bunch? Your clues point to the fix.
Be realistic about your skills. Rolling on sealant? Maybe. Digging a 6-foot trench around your house? Absolutely not.
Talk to a pro. For anything more than a damp wall, this is the step that saves you money. Get a pro to look at it. They’ll see things you don’t.
Getting a dry basement isn’t about picking the perfect solution from a blog. It’s about matching the right tool to your very specific, very annoying problem. Sometimes that’s a $50 bucket of paint. Sometimes it’s a $10,000 excavation.
But once it’s done? That’s when you get your basement back. No more smell. No more moving boxes off the floor “just in case.” You can finally put in that waterproof flooring for basements you’ve been eyeing.
And that’s the whole point, right? To waterproof the basement walls and floors so you can stop worrying about them, and start using them.
Your Path to a Dry Basement
So, there you have it. Five ways to fight a wet basement, from simple DIY sealants to full-scale excavation. The right fix depends on whether you’re seeing dampness, a trickling wall crack, or a rising floor lake. Spot the signs, match them to the method, and don’t be afraid to call for backup.
Think you’ve figured out your problem? Let J & J Development Remodeling INC. make it simple. We provide professional Basement Waterproofing, finding the right fix for your specific situation to help you get the bone-dry, usable basement you deserve. Give us a call at (661) 675-6520 or visit https://jjdevelopmentinc.com/basement-waterproofing/ to learn more and stop the damp for good.
Frequently Asked Questions
There is no single "best" method; the most effective solution depends entirely on your specific problem, whether it's minor dampness, wall cracks, or groundwater rising through the floor.
The main types of basement waterproofing are interior sealants, exterior membranes, interior drainage systems like French drains, crack injections, and sump pump installations.
Applying an interior basement waterproofing sealer is typically the most affordable upfront method for tackling minor dampness on walls and floors.
For a near-permanent solution, external basement waterproofing.
To stop water coming up through the floor, you need an interior drainage system.